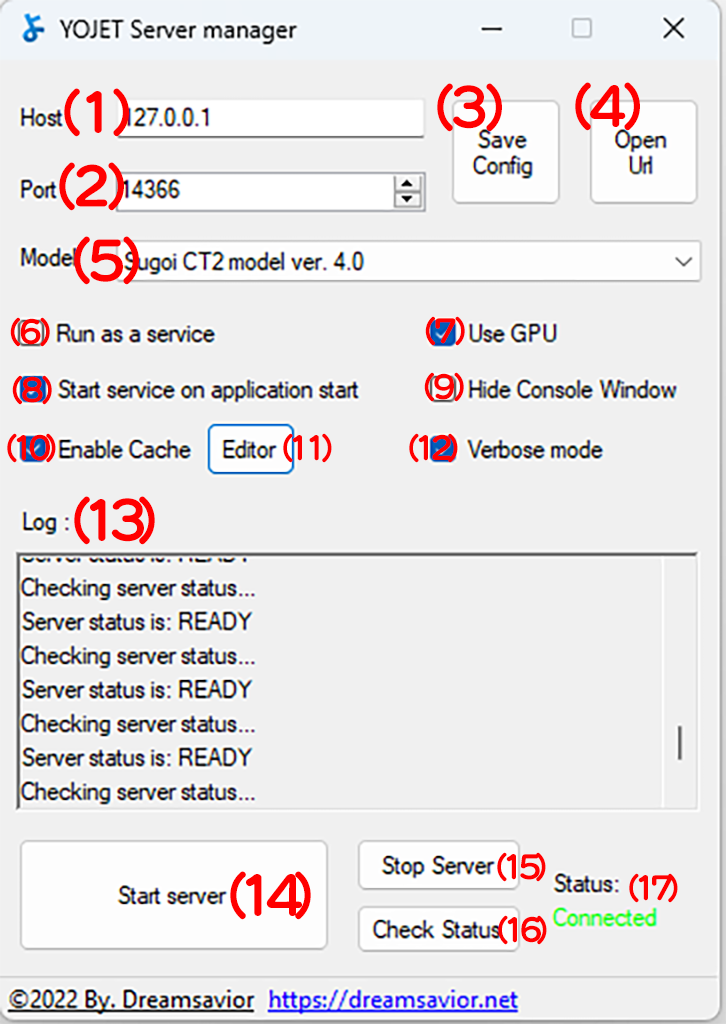
The running server’s port address; please pay attention to this port address value if translation is not working, as most issues arise from the server port value not matching the request port.
Saving the configuration.
Opening YOJET Web in the browser.
The model is a library and artificial intelligence insight that determines how translation reactions occur on the request. The type of model affects the speed and accuracy of translation. Choose the CT2 model for fast performance.
Run as a service, register YOJET, and run the server as a Windows service. The advantage is that you can set it in the Windows service manager (such as running automatically when Windows starts). Note that running as a service makes the server run in the background, meaning it is not listed in the Task Manager, so don’t be surprised if there is significant memory usage without being traced. If you enable Run as a service, the console will not appear.
Use GPU. Use GPU instead of CPU when translating; this option only appears if the GPU you are using has CUDA cores.
Start Service on application start turns on the server when the YOJET application is launched; this is not an automatic option when Windows starts.
Log Console will not appear when the server is running; this option is only available if Run as a service is not active.
Activate cache on translation.
Edit Cache.
If activated, the translation results will prefer shorter sentences.
Display logs, refresh every 30 seconds.
Start the server.
Turn off the server.
Update server status.
Current server status, there may be a delay; to manually update the status, press Check status.
We use cookies to ensure that we give you the best experience on our website. If you continue to use this site we will assume that you are happy with it.Ok