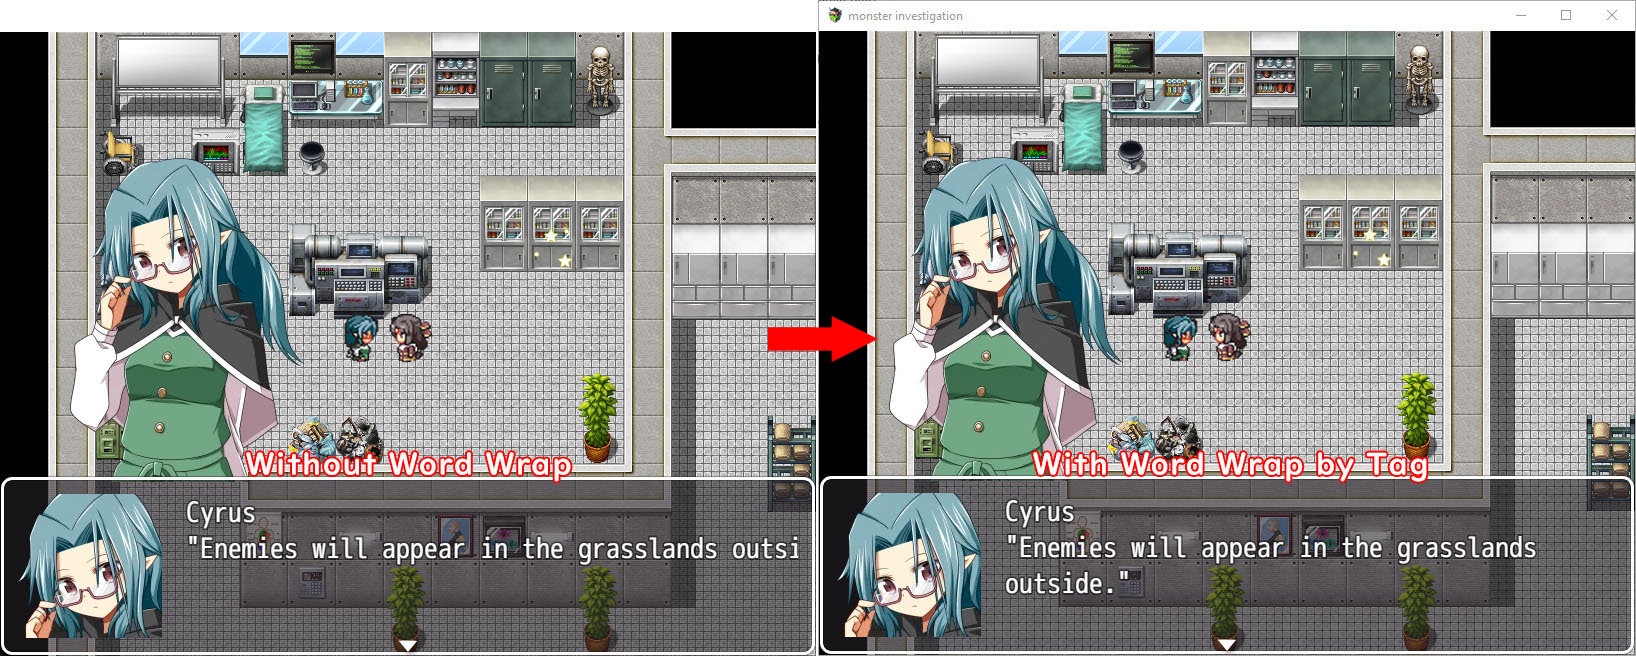
As mentioned in the guide about Word wrapping here.
Sometimes when translating text, especially from Japanese, the problem is that long sentences break through windows.
There are several ways to solve this
This time we will talk about the use of Wrap Text.
basically, Wrap Text is adding a line break (\n) after the specified number of characters.
The use of Wrap Text is divided into 2, put in the worksheet column or put only at the time of injection into the game. we will discuss the second one, namely Word Wrap by Tags in Apply Translation.
Reason to Choose and use Word Wrap by Tags
Because it is applied during game injection, it won’t break your worksheet. so it is suitable for translation testing, and the tag feature allows you to specify the character length based on tags.
For example there a 2 (or more) scenarios where the dialog window has different maximum length character

or different narration with a message box or the game has custom bubble conversations or games that have a log dialog feature.
Video tutorial
How To Use Word Wrapping by Tags
1. Find out what the character limit is in the game windows.
It depends on the size of the dialog windows, the font type used, and the font size used.
Find out how many characters can be listed.
For example, in the RPG Maker MV game with the default font and size, the number of characters listed in the windows is about 55 characters without an avatar and 43 characters if an avatar is inserted.

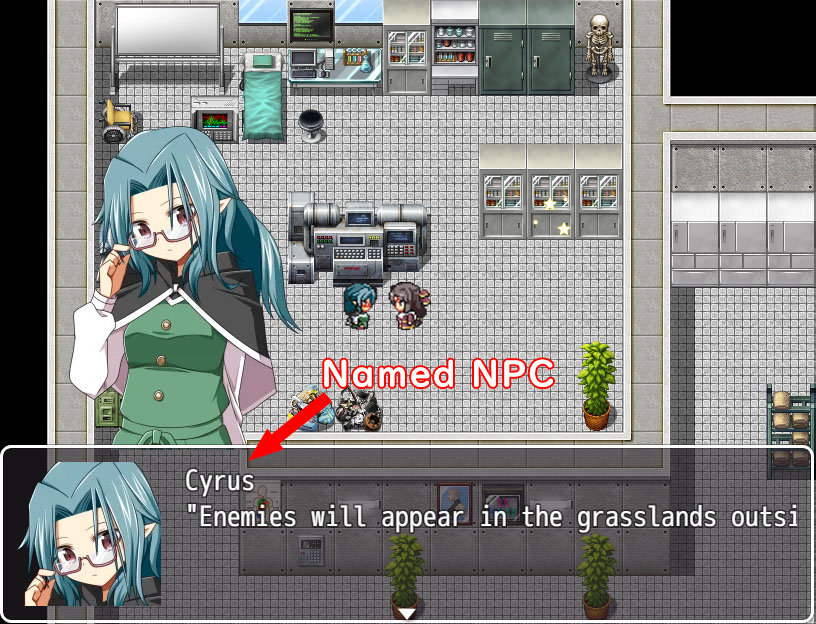
2. Find out when the dialog appears.
For example, generally in RPG games the dialog box that is truncated by the avatar image is only “Named NPC”, so you know what you have to do, which is to give Word Wrap “only” to Named NPC.
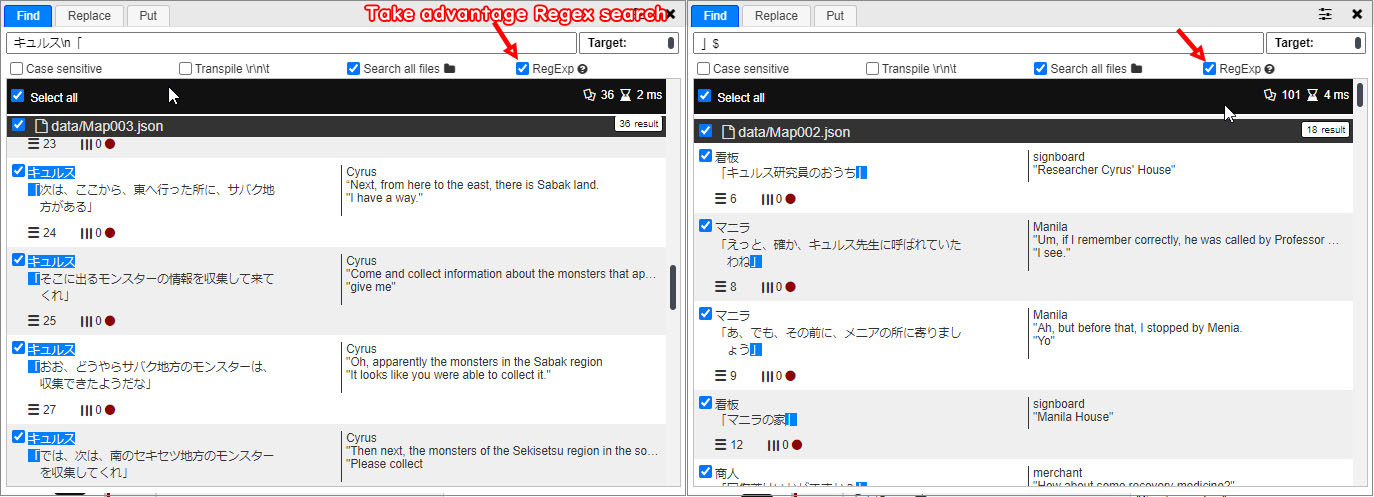
Cyrus avatar dialogs always start with the name “キュルス” followed by enter and then the content of the conversation.
Then you can use the search and regex features by searching for
^キュルス\n「Another example:
All dialogs end with “」” then you can use the search and regex feature by searching for
」$
That method was universal for any type of game and engine.
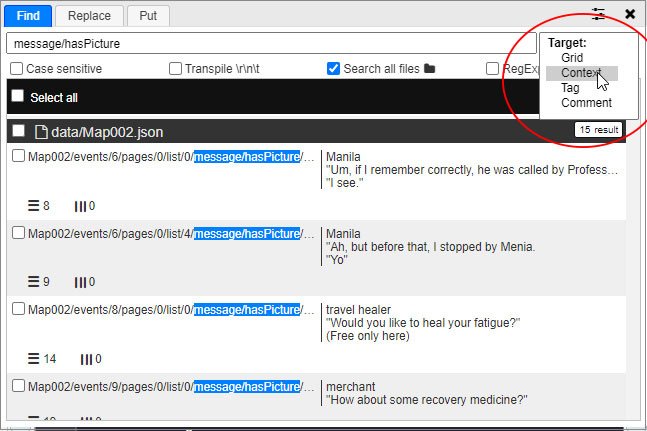
But if your game is RPG Maker MV then there is a short way. The message’s contents are divided into “No Picture” and “Has Picture” categories. Take advantage of that by using Search and Target: Context feature and search:
message/hasPictureFor dialog with a picture, and
message/noPictureFor dialog without a picture
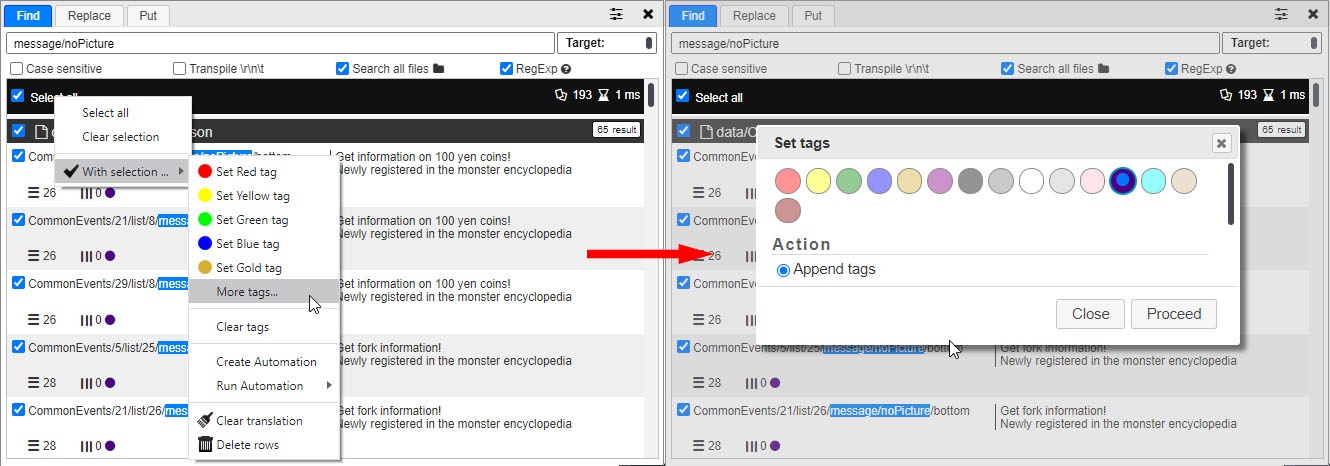
3. Append tag on search result.
After you search and show the result, Click the “Select All” checkbox to select all search results then right-click and over it to “with selection…” to open submenu and select “Set Color Tag”.
For this example, I add Darkred for all dialogue containing quotes, Tan color for Cyrus’s Dialogue, Aqua color for hasPicture Context, and Indigo for NoPicture Context.
4. Ready for Word Wrap by tags.
Word Wrap by tags is Apply Translation’s feature, so click Syringe icon and then scroll down for Word Wrap by tags context. Click add row to add whichever color has a certain character limit.

If you apply translation with Word Wrap by Tags feature, your worksheet stays the same, but the generated script will apply the setting like below.