Translator ++ has a tool that allows us to easily translate the Translator ++ UI into any language, so that users can change the language via the Options Window.
Installing the Localization tool addon
Translator++ has an addon to help us translate the UI easily.
Here are the steps to install the addons:
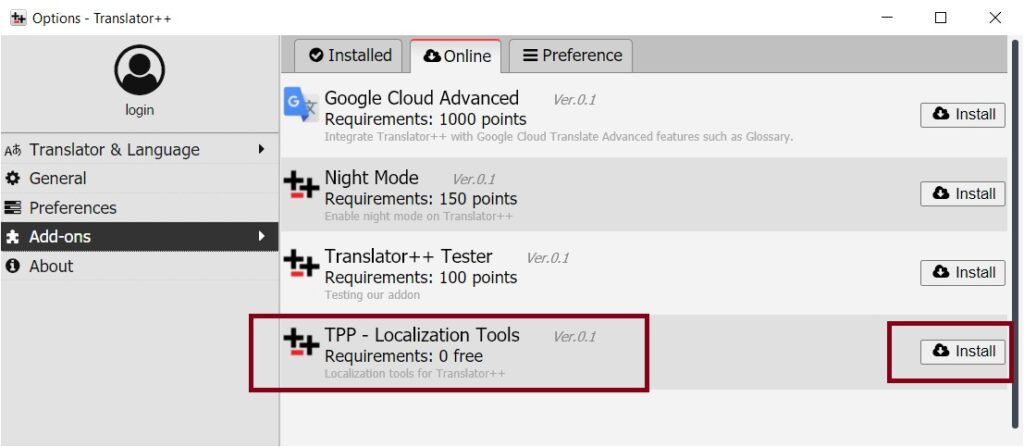
- Open Options window
- In the Add-ons menu, click the Online tab, and then click Install on TPP – Localization Tools. The TPP Localization Tools add-on is free for anyone to install.
- After the TPP – Localization Tools is installed, you need to restart Translator++.

Generating Translation Template
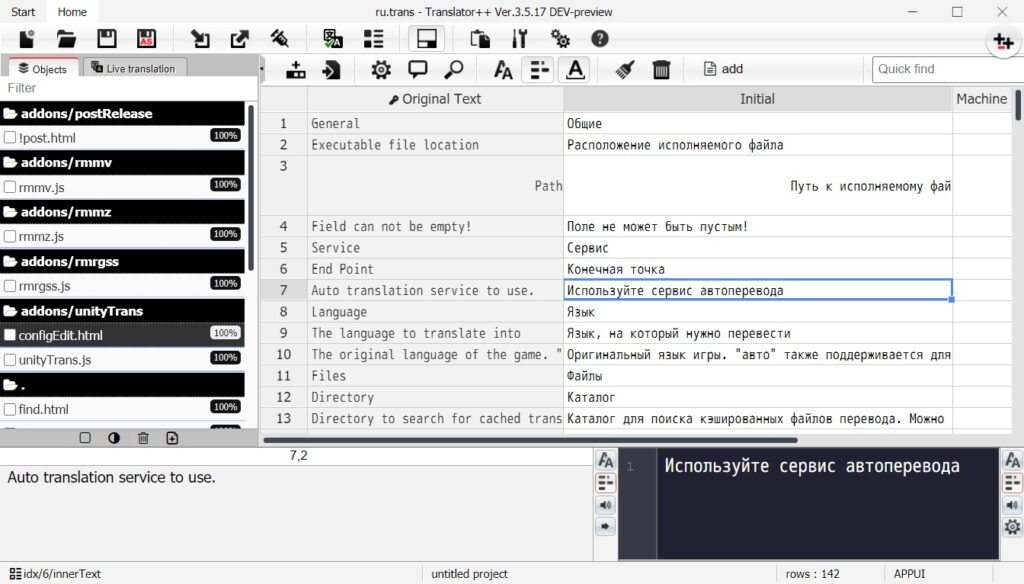
With the TPP – Localization Tools installed, you can generate a translation template of Translator++. A translation template is a trans file that contains all the text in the Translator++ UI. And you can use Translator++ to open this trans file and translate it to any language as you like.
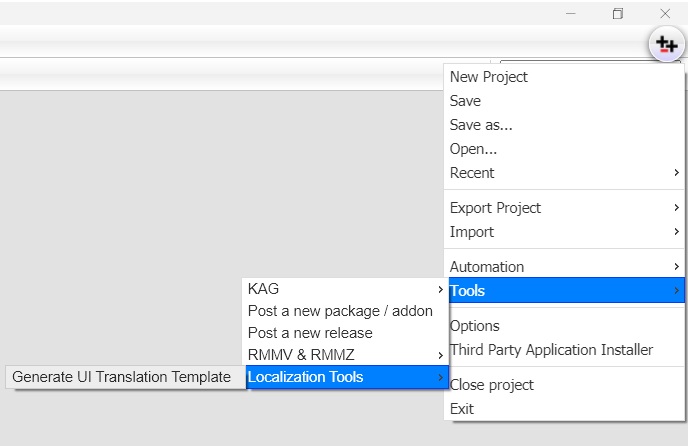
To generate a translation template, you need to click the “Generate UI Translation Template” menu from the main menu. Wait for the save dialog to appear. Save the generated trans file into your hard drive, and then edit it with Translator++.

The location of “Generate Ui Translation Template” is at:
Main Menu → Tools → Localization Tools → Generate UI Translation Template

Applying the Translation
After translating the UI, save the translation in the www/lang folder. You can name your translation file whatever you want, but I recommend using the standard ISO 639-1 (two characters language code).
After that edit the options.json and add a new language.
Options.json looks like this:
After that, save the file, and restart your Translator++.
Submitting your Translation
Are you satisfied with your translation and want to share with others? You can submit your translation results to be included in the Translator++ distribution. That way you don’t have to bother doing the steps above again every time you update / upgrade Translator++. Please also include a name so we can credit you properly.
Please email me at: dreamsavior at gmail dot com.
