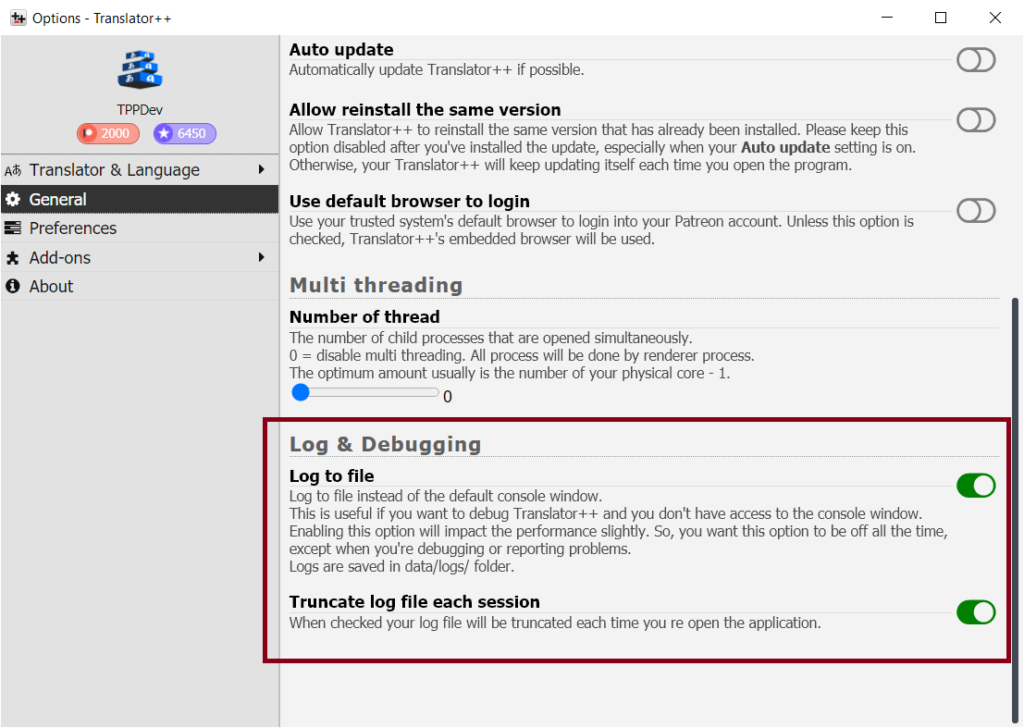
This guide will show you how to dump the log file into a file.
Why might you need this?
- You can not access the Developer Tool window. (You can open Developer Tool window by pressing F12. Developer Tool only available on the developer version of Translator++)
- You are using the regular version which doesn’t have Developer Tool
- You want to generate and preserve the logs automatically.
How to enable file logging
1. Open the options menu
You can open the options menu by clicking ![]() button
button
2. Go to the General → Log & Debugging section and check the “Log to file” option.

3. Close the options window and restart your Translator++
4. Reproduce the action that you want to log.
5. Browse the log file(s) located at data/logs/ relative from your Translator++ installation.
Enable file logging through manifest file (package.json)
In some cases you may not be able to access the options menu because the application crashes on boot-up.
In a scenario like this you might want to forcefully enable file logging via the manifest file.
Open the package.json file in the root of the Translator++ folder, set the logToFile value to true.
