
1. Install GPT4All
Download and install GPT4All from the following website :
https://github.com/nomic-ai/gpt4all
Don’t forget to install the appropriate model for your GPT4All.
You can try the following models:
Place your model into the Download path of your GPT4All’s Application General Settings :
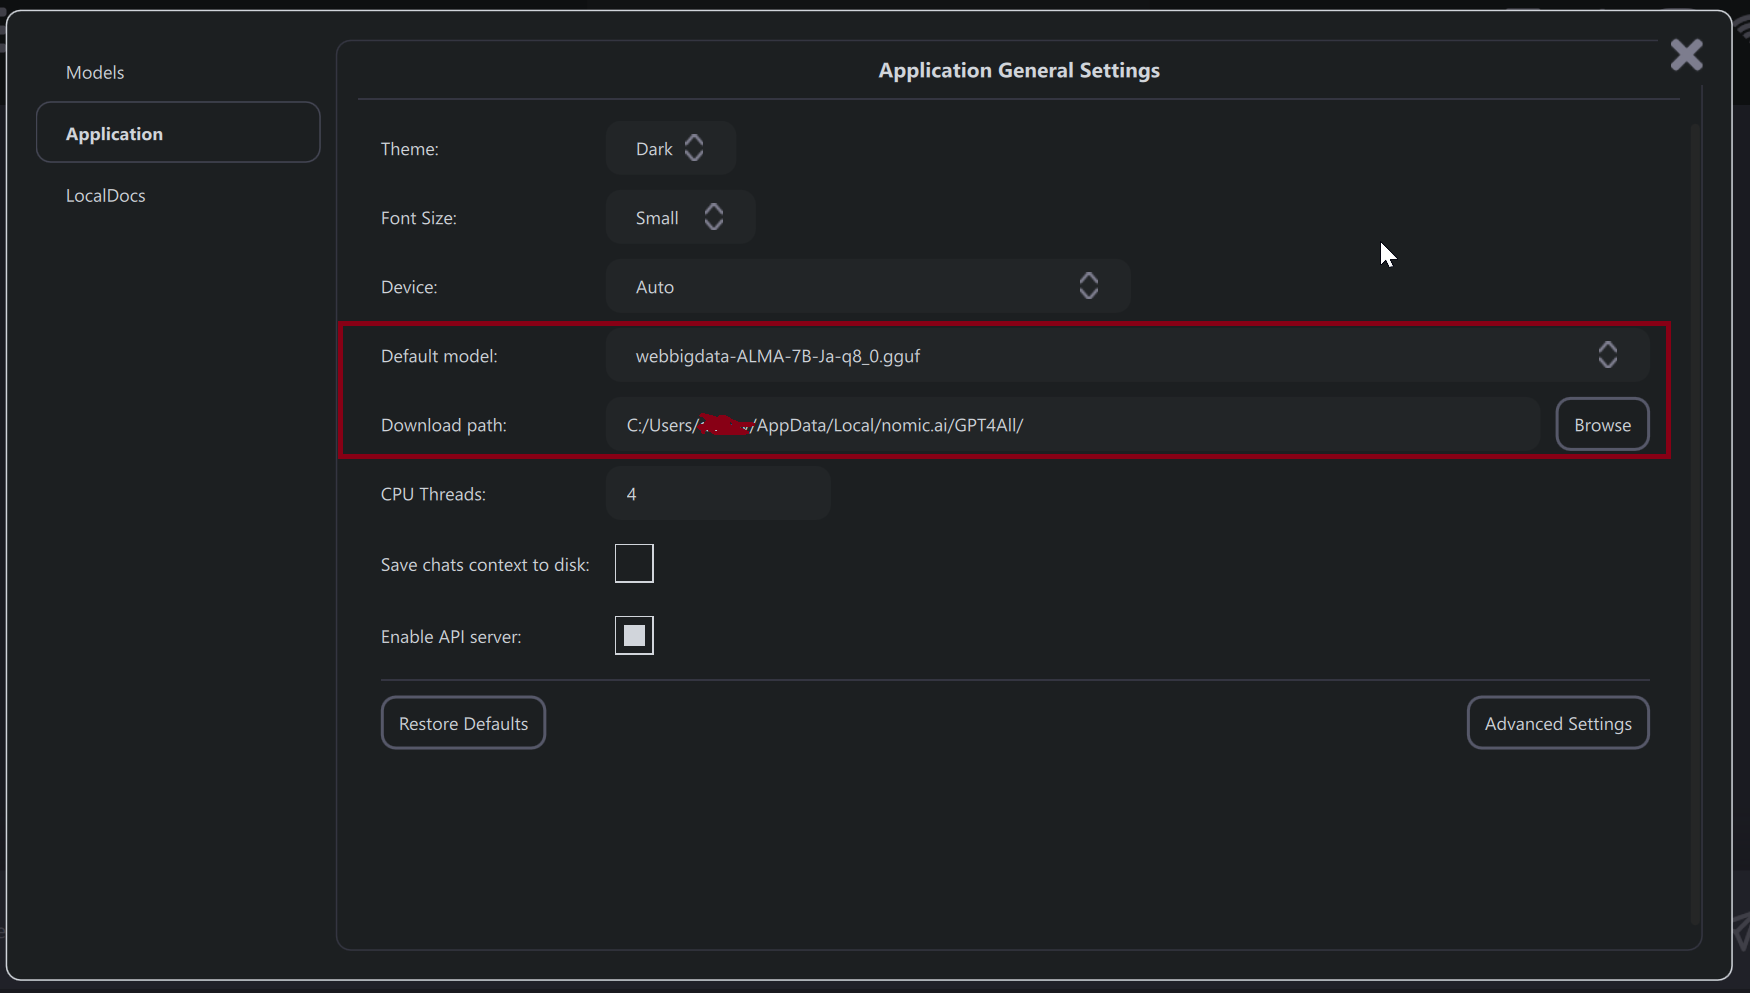
By default the Download path is located at: C:\Users\{yourname}\AppData\Local\nomic.ai\GPT4All
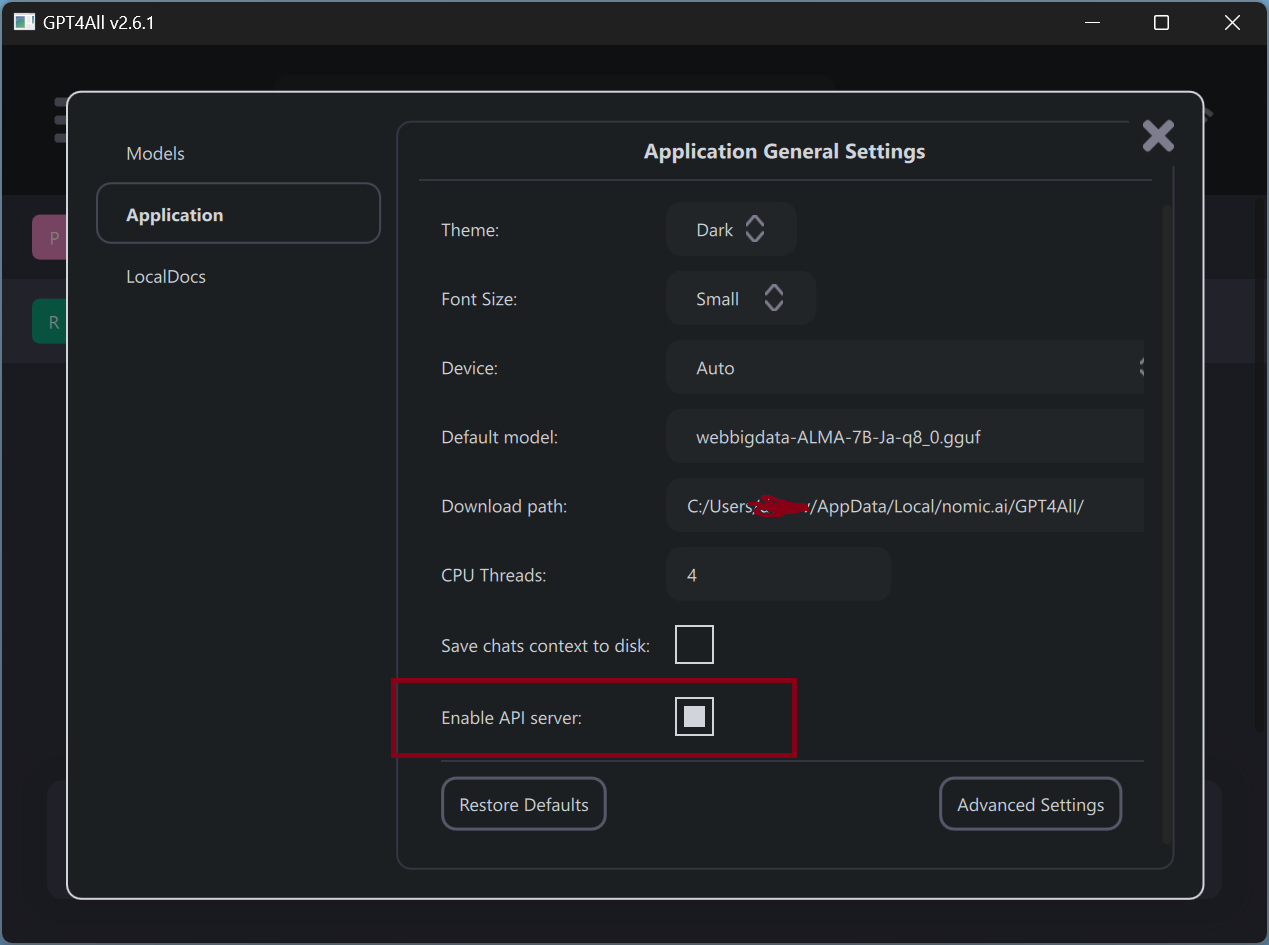
2. Enable API Server in GPT4All2
Once GPT4All is installed, you need to enable the API server.
Click the gear icon:

Check Enable API server
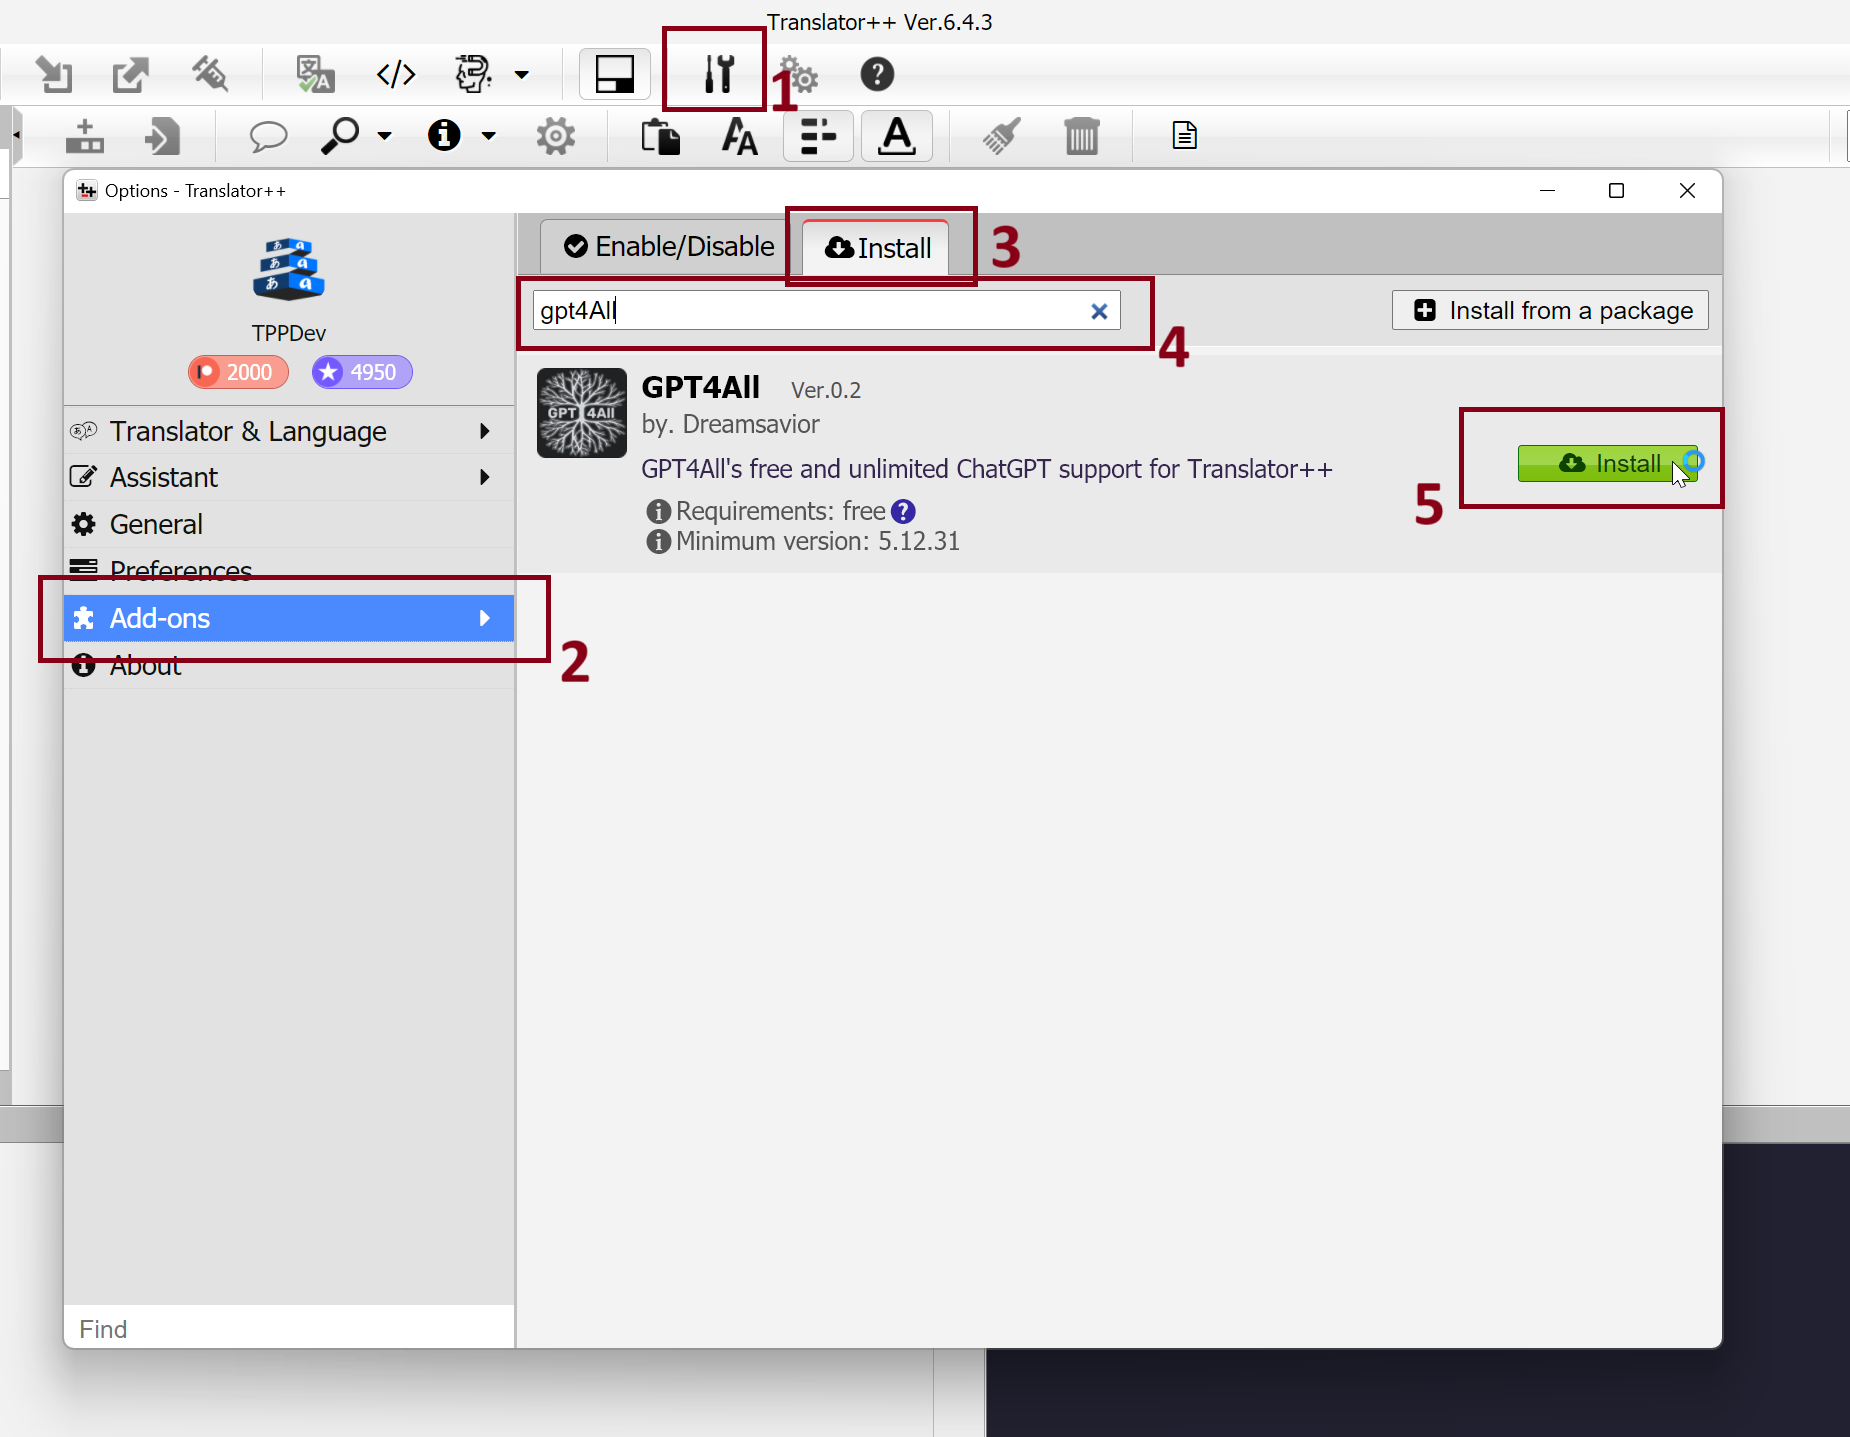
3. Install GPT4All Add-on in Translator++
To integrate GPT4All with Translator++, you must install the GPT4All Add-on:
- Open Translator++ and go to the add-ons or plugins section.
- Search for the GPT4All Add-on and initiate the installation process.
- Once installed, configure the add-on settings to connect with the GPT4All API server.
4. Setting Up the GPT4All Add-on
- Navigate to the Translator & Language section and choose the GPT4All Text Complete option.
- Enter the model details. Ensure that the model name matches exactly with the one you’re utilizing in the GPT4All application.
- For instance, if your chosen model is
webbigdata-ALMA-7B-Ja-q8_0.gguf, inputwebbigdata-ALMA-7B-Ja-q8_0as the model name in Translator++.
